
 ENG
ENG
 English
 中文简体
中文简体 русский
 Español
 عربى
عربى
Applying RTV gasket maker is the straightforward part of a resealing job. The discipline comes later, when the bead is laid and the temptation grows to refill the fluids and hit the starter. The working numbers most professionals rely on are simple: the sealant skins over in roughly 15 to 30 minutes, reaches handling strength in 1 to 2 hours, and needs a full 24 hours at room temperature to cure before fluids go in and the engine starts.
Those windows exist for good reasons. RTV silicone does not dry like paint; it converts from a paste into solid rubber through a moisture-triggered process that works from the exposed surface inward. Interrupting that process with oil pressure, coolant flow, or combustion heat puts the entire seal at risk. If you want the broader material context first, this overview of how RTV silicone gasket makers enhance sealing and bonding explains the behavior behind the cure clock.
QUICK ANSWER
Skin-over: 15 to 30 minutes. Handling strength: 1 to 2 hours. Full cure before adding fluids or starting the engine: 24 hours at room temperature.
The principles below apply to any room-temperature vulcanizing silicone used as a formed-in-place gasket, from oil pans and valve covers to timing covers, water pump housings, and industrial flanges.
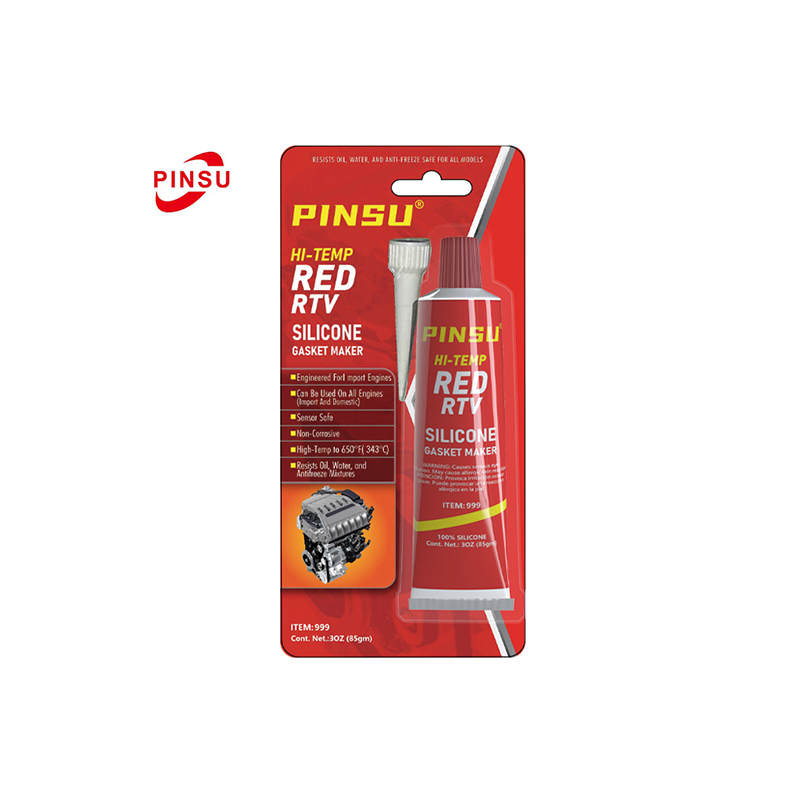 Hi Temp RTV Silicone Gasket Maker for Automotive and Industrial UseA single-component, room-temperature-curing silicone that forms elastic formed-in-place gaskets on metal joints. Suitable here as an example of RTV chemistry for oil pans, valve covers, timing covers, water pump housings, and industrial flanges.View Product →
How RTV Gasket Maker Cures: Skin-Over, Handling, and Full Cure
RTV stands for room-temperature vulcanizing. The compound inside the tube stays stable until it meets moisture in the air, which starts crosslinking at the exposed surface. Because curing begins outside and works inward, the bead passes through distinct stages, and each stage unlocks a different amount of freedom in the job.
Understanding the stages prevents two opposite mistakes: assembling the parts so late that the bead has already skinned over, and filling the engine so early that the core of the bead is still paste.
| Stage | What Is Happening | Typical Time | What You Can Do Safely |
|---|---|---|---|
| Skin-over | A tack-free rubber film forms across the surface | 10 to 30 minutes | Finish assembly before this window closes |
| Handling strength | The body of the bead firms up and grips both flanges | 1 to 2 hours | Final torque to specification, careful handling |
| Set-up | The seal resists light contact and smearing | About 2 hours | Keep every fluid away, avoid vibration |
| Full cure | The entire bead has become solid silicone rubber | About 24 hours | Add fluids and start the engine |
15-30 minSkin-over window for assembly
1-2 hoursHandling strength and torque point
24 hoursFull cure before fluids and startup
Thickness is the hidden variable in every schedule. A thin, continuous bead of 2 to 3 mm cures through its full depth in about a day, while a fat fillet laid to bridge a wide gap can stay soft at its core far longer, because moisture can only reach the interior so fast. When a gap is genuinely too wide for RTV, the correct answer is a different gasket solution, not more sealant.
The Practical Timeline Before You Turn the Key
A typical job follows the same rhythm regardless of the flange. The sequence below assumes room temperature around 20 to 25 degrees Celsius and a standard automotive formulation; always confirm the schedule against the datasheet of the exact product in the tube.
- Clean and dry the mating surfaces so the bead bonds to metal instead of to an oil film.
- Apply a continuous bead around the bolt pattern, then assemble the parts within the skin-over window, typically within 10 to 15 minutes.
- Start every fastener finger-tight and align the joint on its locating dowels; never slide a skinned bead across a flange.
- Wait about 1 hour, then torque the fasteners to specification in the recommended sequence, unless the datasheet directs otherwise.
- Leave the assembly undisturbed for a full 24 hours so the bead cures through its entire depth.
- Fill fluids slowly, idle the engine briefly, shut it down, let it cool, and inspect the flange edges for weeping.
The timeline rewards planning. Applying the bead in the evening and starting the engine the next morning converts most of the cure window into idle time, which is why professional shops so often schedule resealing as overnight work.
Why Starting the Engine Too Soon Ends in Leaks
An uncured bead has almost no mechanical strength. The moment the engine runs, three separate mechanisms attack it at once, and any one of them is enough to turn a careful application into a comeback leak.
- Clamp load and vibration squeeze the soft material. Fresh RTV behaves like thick paste, so flange movement pushes it out of the joint before it can grip the metal.
- Fluids wash out the uncured sealant. The first seconds of oil circulation splash across fresh beads near the pan rails and pump housing, carrying loose material into the sump where it can drift toward the pickup screen.
- Pressure carves a permanent channel. If oil or coolant finds the soft interior of the bead before crosslinking finishes, it pushes a groove through the fillet, and the material later hardens around that groove, locking the leak path in place.
A bead that has not fully cured behaves like paste under pressure, not like a gasket. No amount of careful application makes up for a cure window that was cut short.
There is also a contamination cost. Uncured silicone that circulates through the lubrication system can restrict narrow passages and screens, turning a sealing shortcut into a far more expensive repair. Once the material has fully cured, its resistance to hot oil, fuel, and coolant is excellent, which is precisely why the cured state is worth waiting for. A closer look at whether RTV gasket sealant resists oil, fuel, and chemicals shows how much that final structure matters.
What Speeds Up or Slows Down RTV Curing
The 24-hour figure is a room-temperature benchmark, not a law of nature. Real workshops operate in conditions that move the timeline in both directions, and knowing which way keeps expectations realistic.
| Factor | How It Changes the Cure | Practical Takeaway |
|---|---|---|
| Temperature | Cold slows every stage; a bead applied near 5 degrees Celsius can take roughly twice as long to reach the same state | Warm the workspace or extend the wait |
| Humidity | Airborne moisture drives the cure, so very dry air slows skin-over | Moderate humidity helps; never seal the joint airtight |
| Bead thickness | Curing runs from the surface inward, so thick fillets stay soft inside far longer | Use a thin continuous bead instead of filling gaps |
| Airflow | Stagnant air limits the moisture supply around the joint | A ventilated space cures more evenly |
| Surface condition | Oil films and old gasket residue interfere with wetting and adhesion | Clean and dry the flange before application |
| Formulation | Fast-cure and high-temperature chemistries publish different skin-over and full-cure times | Follow the datasheet of the exact product |
Cold is the factor technicians underestimate most. A bead laid in an unheated winter workshop can need about double the label time, and very dry air slows the surface reaction for the same reason. When the schedule and the weather argue with each other, extend the wait rather than trusting the number printed on the tube.
A Step-by-Step Workflow That Protects the Cure
Cure time is only half of the quality equation; the other half is giving the material the right conditions during that time. The workflow below reflects the version used across professional shops and adapts to any formed-in-place gasket job.
- Remove all old gasket material and wipe the flange with a residue-free cleaner until a fresh cloth comes away clean.
- Dry-fit the parts first to confirm alignment, dowel locations, and fastener condition.
- Cut the nozzle to bead size and lay a continuous bead about 2 to 3 mm wide around the bolt pattern, enclosing each bolt hole from the inside.
- Assemble within the skin-over window so the still-tacky surface wets both flanges and forms one bonded joint.
- Start all fasteners finger-tight; the bead should squeeze out slightly and evenly as the gap closes.
- After about 1 hour, torque to specification in the crossing sequence specified for the flange.
- Trim heavy squeeze-out before it skins if needed; once cured, leave the fillet alone rather than cutting into it.
- Wait the full 24 hours, then fill fluids, idle the engine, and recheck the flange after the first heat-and-cool cycle.
One habit deserves emphasis: re-torquing after full cure is not part of the process. Pulling on hardened silicone tears the fillet away from the flange and creates the very leak the cure time was protecting against. If a re-check is specified at all, it belongs at the 1-hour mark while the material still has some give.
Can You Start Sooner? What Experienced Technicians Accept
Real-world practice varies more than datasheets admit, and it helps to understand why. Not every flange faces the same exposure. A valve cover in a low-splash design sees oil vapor and occasional contact, while an oil pan rail sits in a bath of oil with constant sloshing from the first crank. The consequence of an early start scales directly with that exposure.
That is why some technicians treat low-exposure housings as same-day jobs, returning a vehicle to light service a few hours after assembly, while treating anything that sits in fluid as an overnight requirement. The approach trades risk for schedule, and it only works when everyone accepts that a shortened cure can shorten the life of the seal. On any flange where fluids press against the bead, the 24-hour cure remains the standard that datasheets, warranties, and comeback-free repairs are built on.
What never works is using the engine itself as an accelerator. Startup heat does speed chemical processes, but it arrives together with washout and pressure, so the bead faces its harshest conditions at its weakest moment. A warmed room is a reasonable way to help a cold-weather cure along; a running engine is not.
Six Cure-Time Mistakes That Ruin a Good Seal
Most RTV failures traced back to the shop floor involve one of the items below, and every one of them is avoidable with a plan.
- Filling fluids at the first hour mark. Handling strength is not full cure; the core of the bead is still soft and wide open to washout.
- Laying an oversized bead for safety. Extra material cures slowly through its core, squeezes out under clamp load, and can shed crumbs into the sump.
- Assembling after the skin has formed. A skinned surface no longer wets the flange, so the bond that holds the gasket in place never develops.
- Re-torquing after full cure. Twisting hardened silicone separates it from the metal and starts a leak that did not exist before.
- Ignoring shop temperature. A schedule written for room temperature promises nothing on a cold, dry winter day.
- Trapping RTV between solid gasket layers. Coating both faces of a pre-cut gasket seals the material away from air and moisture, so its interior may never cure at all.
Choosing an RTV Formulation That Matches the Job
Cure time is only one specification to compare. A gasket maker intended for engine flanges should also list a temperature range covering continuous and peak operating heat, resistance to oil and coolant, and enough flexibility to absorb thermal expansion between dissimilar metals. Engines fitted with oxygen sensors and catalytic converters also call for low-volatility, sensor-safe formulations that will not damage the sensing elements as the bead cures.
Industrial buyers normally weigh these properties next to the cure schedule in the datasheet, since skin-over, torque, and full-cure times differ noticeably between standard and high-temperature chemistries. Color families such as grey, black, and red usually hint at different temperature and fluid-resistance targets, but the datasheet, not the color, is the authority. A high-temperature resistant silicone gasket seal formulated for automotive and industrial flanges, for example, is built to hold its cured strength exactly where standard construction silicones begin to soften.
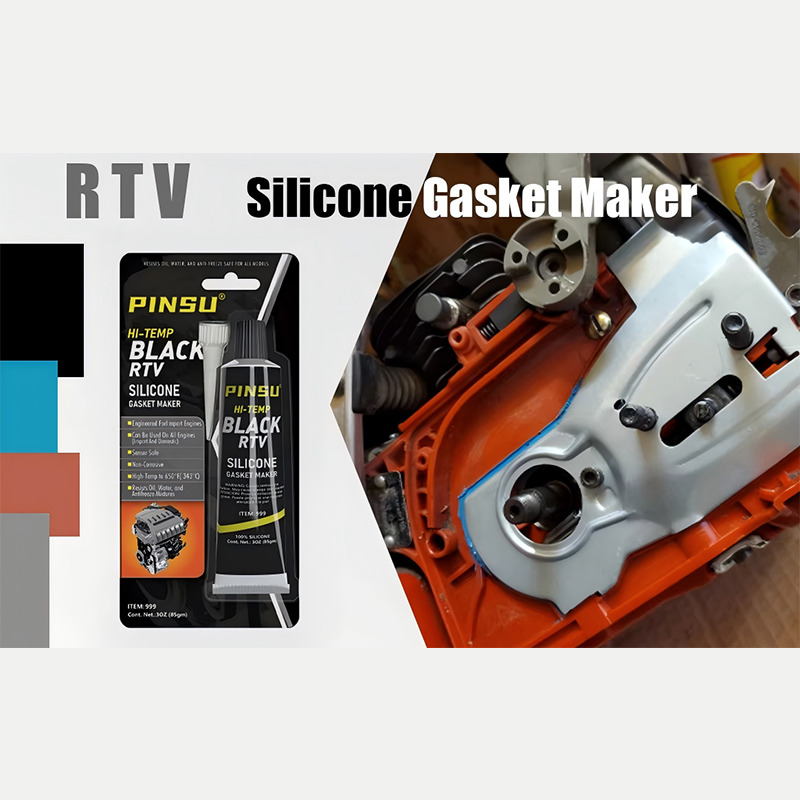 PINSU RTV High Temperature Resistant Silicone Gasket Seal in Red, Black, and GreyThis one-part RTV gasket maker operates from -50°C to +300°C, resists oil and water, and cures without shrinking or cracking. It fits the discussion of high-temperature formulations whose datasheets, not colors, define temperature and fluid-resistance targets.View Product →
A Complementary Option for Rigid Metal Joints
RTV is the right tool when a joint needs gap filling and flexibility, but not every sealing task rewards a rubbery fillet. Close-fitting machined connections, such as threaded fittings and rigid metal flanges clamped metal to metal, are often sealed instead with anaerobic compounds that stay liquid in air and harden only between tight metal surfaces. Keeping both chemistries in the kit lets the joint design, rather than habit, choose the material.
 PINSU A271 Industrial Grade Anaerobic Adhesive for Metal Thread SealingA one-component anaerobic threadlocker that cures between tight metal surfaces, preventing loosening and leaks while resisting oil, water, and solvents. It complements the preceding point on using anaerobic chemistry for close-fitting machined joints.View Product →
Frequently Asked Questions
Q1: How long does RTV gasket maker take to cure fully?
At room temperature, most automotive formulations reach full cure in about 24 hours, the point at which the entire bead rather than just its surface has become solid silicone rubber able to withstand fluid pressure and heat. Fast-cure and high-temperature products differ, so the datasheet of the exact product always outranks general rules.
Q2: Can I start the engine 1 or 2 hours after applying RTV?
One to two hours delivers handling strength, which is enough for final torquing but not for fluids and combustion heat. Some technicians do return low-exposure housings to light service early and get away with it, but on any flange bathed in oil or coolant the risk of washout and channel formation is high. The 24-hour wait remains the professional standard.
Q3: Does warmth help RTV cure faster?
Moderate warmth and reasonable humidity genuinely accelerate the moisture-triggered cure, which is why a cold, dry shop is the worst-case environment. The distinction is control: a heated room helps, while starting the engine exposes the bead to pressure and washout at its weakest stage, doing far more harm than the heat does good.
Q4: When is it safe to add oil or coolant?
After the full cure, typically 24 hours from application. Filling earlier is the most common way to ruin an otherwise correct application, because the first circulation of fluid sweeps across the bead exactly when its interior is still soft.
Q5: How thick should the bead be for predictable curing?
A continuous bead of roughly 2 to 3 mm cures evenly and carries clamp load well. Wide gaps call for a different gasket solution, because a thick mass of RTV cures from the surface inward and can remain uncured at its core for days.
Q6: Can RTV replace a head gasket or an exhaust manifold gasket?
No. Head gaskets seal combustion pressure and exhaust flanges face extreme heat, both beyond what a room-temperature-cured silicone bead is designed to handle. RTV excels on flexible, low to medium pressure flanges such as oil pans, valve covers, timing covers, water pump housings, and thermostat housings.


 TOP
TOP